Display your button collection in this easy wall art project. Affiliate links included for your convenience.
I don’t know why I ended up with this jar of buttons. I think it was my grandmother’s, and it ended up in my stash at some point when I still lived with my parents and came with me when I moved out.
It’s been sitting in my craft space/office for years.
Every now and then I’ll pull out a button or several for a project.
One was used on a baby sweater in one of my books. Others have been used on projects for my kid.
But the jar was staying pretty full.
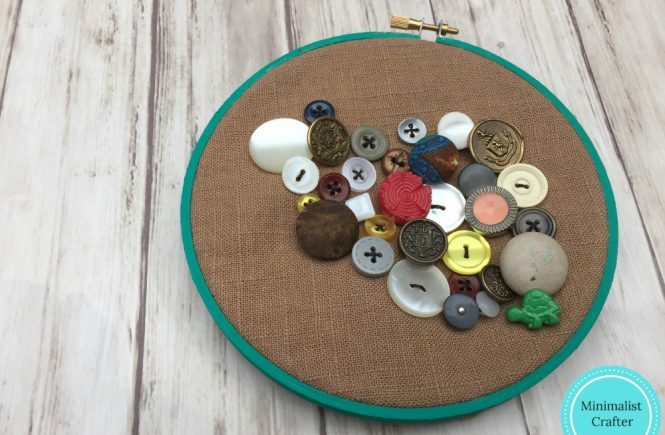
I didn’t want to throw out the buttons, but I was sure they could be put to better use than just sitting in a jar, so I came up with this easy wall art project to display some of them.
Materials
- buttons (the more the better)
- 6-inch embroidery hoop
- paint and paintbrush (optional)
- thread and needle
- sturdy fabric, such as heavy-duty cotton, burlap, etc.
How to Make Button Wall Art
First, paint the outside of your embroidery hoop if you like. I used a teal green.
Cut your fabric to fill the hoop with extra fabric to cover the back, if you like.
Use your needle and thread (I used black thread but you can choose any color or colors you like) to sew the buttons on. Try not to plan too much where they go, but if you have a lot of similar-looking buttons, try to spread them out.
You decide when it’s done: either your hoop is full or as full as you’d like it or you run out of buttons. Sew or glue down the fabric at the back as you like to finish.
This is a fun way to display buttons that have been passed down or that are otherwise special, and it makes great wall art for your sewing area as well.
And if you ever want to use one of the buttons, you can just snip the thread and remove that one. (If you think this is something you might want to do, tie a knot after sewing each button on so you won’t lose a whole bunch of them if you cut one out.)


